This article will demonstrates about the Pacemaker/Corosync cluster membership, node management and other cluster operational tasks. Periodically , you might need to take the cluster node offline to perform the maintenance activities like OS package update/upgrade , hardware replacement/upgrade etc. In such cases ,you need to put the cluster node in to standby mode to keep the cluster operational on other node to avoid the voting issue (In-case of two node cluster). The cluster stand-by option is persistent across the cluster node reboot. So we no need to bother about the automatic resource start-up until we make the node as un-standby.
In the last section , we will see about the cluster maintenance mode which is completely different from the node standby & un-standby operations. Cluster Maintenance is a preferred method if you are doing the online changes on the cluster nodes.
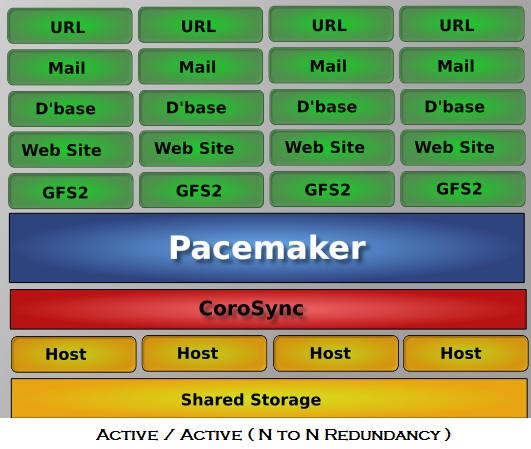
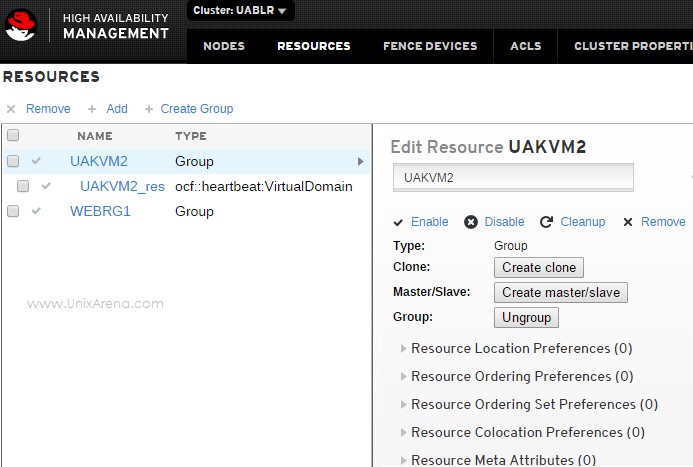
Pre-configured resources are vgres (LVM – volume group), webvolfs (Logical volume) , ClusterIP (HA IP address for website) , webres (Apache) and UAKVM2_res (HA KVM Guest ).
[root@UA-HA ~]# pcs resource
Resource Group: WEBRG1
vgres (ocf::heartbeat:LVM): Started UA-HA
webvolfs (ocf::heartbeat:Filesystem): Started UA-HA
ClusterIP (ocf::heartbeat:IPaddr2): Started UA-HA
webres (ocf::heartbeat:apache): Started UA-HA
Resource Group: UAKVM2
UAKVM2_res (ocf::heartbeat:VirtualDomain): Started UA-HA2
[root@UA-HA ~]#
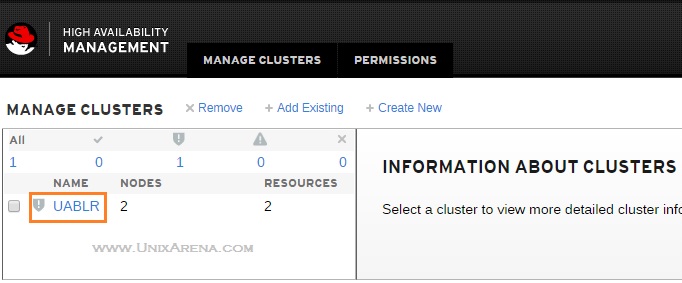
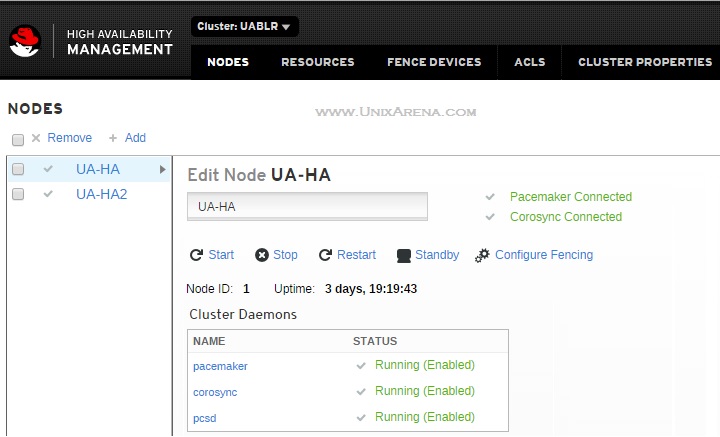
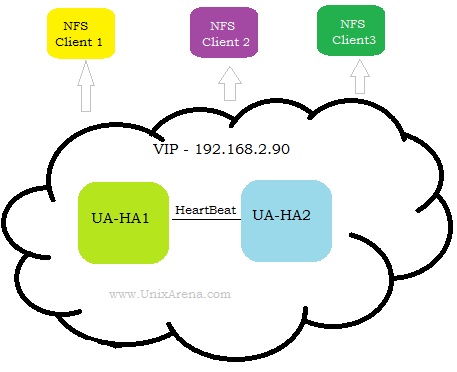
Cluster nodes are UA-HA & UA-HA2.
[root@UA-HA ~]# pcs cluster status
Cluster Status:
Last updated: Sat Oct 17 11:58:23 2015 Last change: Sat Oct 17 11:57:48 2015 by root via crm_attribute on UA-HA
Stack: corosync
Current DC: UA-HA (version 1.1.13-10.el7-44eb2dd) - partition with quorum
2 nodes and 5 resources configured
Online: [ UA-HA UA-HA2 ]
PCSD Status:
UA-HA: Online
UA-HA2: Online
[root@UA-HA ~]#
Move a Cluster node in to the Standby Mode:
1. Login to one of the cluster node with root user and check node status.
[root@UA-HA ~]# pcs status nodes
Pacemaker Nodes:
Online: UA-HA UA-HA2
Standby:
Offline:
Pacemaker Remote Nodes:
Online:
Standby:
Offline:
[root@UA-HA ~]#
2. Verify the cluster status.
[root@UA-HA ~]# pcs status
Cluster name: UABLR
Last updated: Sat Oct 17 12:00:35 2015 Last change: Sat Oct 17 11:57:48 2015 by root via crm_attribute on UA-HA
Stack: corosync
Current DC: UA-HA (version 1.1.13-10.el7-44eb2dd) - partition with quorum
2 nodes and 5 resources configured
Online: [ UA-HA UA-HA2 ]
Full list of resources:
Resource Group: WEBRG1
vgres (ocf::heartbeat:LVM): Started UA-HA
webvolfs (ocf::heartbeat:Filesystem): Started UA-HA
ClusterIP (ocf::heartbeat:IPaddr2): Started UA-HA
webres (ocf::heartbeat:apache): Started UA-HA
Resource Group: UAKVM2
UAKVM2_res (ocf::heartbeat:VirtualDomain): Started UA-HA2
PCSD Status:
UA-HA: Online
UA-HA2: Online
Daemon Status:
corosync: active/enabled
pacemaker: active/enabled
pcsd: active/enabled
[root@UA-HA ~]#
3.You can also use the crm_mon to monitor the cluster status in real time.
[root@UA-HA ~]# crm_mon
Last updated: Sat Oct 17 12:05:50 2015 Last change: Sat Oct 17 12:04:28 2015 by root via cibadmin on UA-HA
Stack: corosync
Current DC: UA-HA (version 1.1.13-10.el7-44eb2dd) - partition with quorum
2 nodes and 5 resources configured
Online: [ UA-HA UA-HA2 ]
Resource Group: WEBRG1
vgres (ocf::heartbeat:LVM): Started UA-HA
webvolfs (ocf::heartbeat:Filesystem): Started UA-HA
ClusterIP (ocf::heartbeat:IPaddr2): Started UA-HA
webres (ocf::heartbeat:apache): Started UA-HA
Resource Group: UAKVM2
UAKVM2_res (ocf::heartbeat:VirtualDomain): Started UA-HA2
To terminate the crm_mon, press control+c.
[root@UA-HA ~]# crm_mon
Connection to the CIB terminated
[root@UA-HA ~]#
4. To move the specific node in to standby mode , use the following command.
[root@UA-HA ~]# pcs cluster standby UA-HA2
[root@UA-HA ~]#
Check the cluster status again,
[root@UA-HA ~]# pcs status
Cluster name: UABLR
Last updated: Sat Oct 17 12:09:35 2015 Last change: Sat Oct 17 12:09:23 2015 by root via crm_attribute on UA-HA
Stack: corosync
Current DC: UA-HA (version 1.1.13-10.el7-44eb2dd) - partition with quorum
2 nodes and 5 resources configured
Node UA-HA2: standby
Online: [ UA-HA ]
Full list of resources:
Resource Group: WEBRG1
vgres (ocf::heartbeat:LVM): Started UA-HA
webvolfs (ocf::heartbeat:Filesystem): Started UA-HA
ClusterIP (ocf::heartbeat:IPaddr2): Started UA-HA
webres (ocf::heartbeat:apache): Started UA-HA
Resource Group: UAKVM2
UAKVM2_res (ocf::heartbeat:VirtualDomain): Started UA-HA
PCSD Status:
UA-HA: Online
UA-HA2: Online
Daemon Status:
corosync: active/enabled
pacemaker: active/enabled
pcsd: active/enabled
[root@UA-HA ~]#
You can see that Resource Group “UAKVM2” is automatically moved from UA-HA2 to UA-HA. You can perform the maintenance activity on UA-HA2 without worrying about the cluster membership and automatic resource start-up.
5. Check the cluster membership status. (Quorum status).
[root@UA-HA ~]# pcs status corosync
Membership information
----------------------
Nodeid Votes Name
2 1 UA-HA2
1 1 UA-HA (local)
[root@UA-HA ~]#
OR
[root@UA-HA ~]# corosync-quorumtool
Quorum information
------------------
Date: Sat Oct 17 12:15:54 2015
Quorum provider: corosync_votequorum
Nodes: 2
Node ID: 1
Ring ID: 2296
Quorate: Yes
Votequorum information
----------------------
Expected votes: 2
Highest expected: 2
Total votes: 2
Quorum: 1
Flags: 2Node Quorate WaitForAll
Membership information
----------------------
Nodeid Votes Name
2 1 UA-HA2
1 1 UA-HA (local)
[root@UA-HA ~]#
Even though node UA-HA2 is standby mode, it still provides the vote to the cluster. If you have halted the node “UA-HA2” for maintenance activity, quorum status will change like below.
[root@UA-HA ~]# corosync-quorumtool
Quorum information
------------------
Date: Sat Oct 17 12:16:25 2015
Quorum provider: corosync_votequorum
Nodes: 1
Node ID: 1
Ring ID: 2300
Quorate: Yes
Votequorum information
----------------------
Expected votes: 2
Highest expected: 2
Total votes: 1
Quorum: 1
Flags: 2Node Quorate WaitForAll
Membership information
----------------------
Nodeid Votes Name
1 1 UA-HA (local)
[root@UA-HA ~]#
Clear the Standby Mode:
1. Once the maintenance is completed for UA-HA2 , just make it as un-standby to make the cluster node available for operation.
[root@UA-HA ~]# pcs cluster unstandby UA-HA2
[root@UA-HA ~]# pcs status
Cluster name: UABLR
Last updated: Sat Oct 17 12:29:21 2015 Last change: Sat Oct 17 12:29:19 2015 by root via crm_attribute on UA-HA
Stack: corosync
Current DC: UA-HA (version 1.1.13-10.el7-44eb2dd) - partition with quorum
2 nodes and 5 resources configured
Online: [ UA-HA UA-HA2 ]
Full list of resources:
Resource Group: WEBRG1
vgres (ocf::heartbeat:LVM): Started UA-HA
webvolfs (ocf::heartbeat:Filesystem): Started UA-HA
ClusterIP (ocf::heartbeat:IPaddr2): Started UA-HA
webres (ocf::heartbeat:apache): Started UA-HA
Resource Group: UAKVM2
UAKVM2_res (ocf::heartbeat:VirtualDomain): Started UA-HA
PCSD Status:
UA-HA: Online
UA-HA2: Online
Daemon Status:
corosync: active/enabled
pacemaker: active/enabled
pcsd: active/enabled
[root@UA-HA ~]#
2.You could move the desired resource group to UA-HA2 .
[root@UA-HA ~]# pcs resource move UAKVM2 UA-HA2
[root@UA-HA ~]# pcs status
Cluster name: UABLR
Last updated: Sat Oct 17 12:32:05 2015 Last change: Sat Oct 17 12:29:19 2015 by root via crm_attribute on UA-HA
Stack: corosync
Current DC: UA-HA (version 1.1.13-10.el7-44eb2dd) - partition with quorum
2 nodes and 5 resources configured
Online: [ UA-HA UA-HA2 ]
Full list of resources:
Resource Group: WEBRG1
vgres (ocf::heartbeat:LVM): Started UA-HA
webvolfs (ocf::heartbeat:Filesystem): Started UA-HA
ClusterIP (ocf::heartbeat:IPaddr2): Started UA-HA
webres (ocf::heartbeat:apache): Started UA-HA
Resource Group: UAKVM2
UAKVM2_res (ocf::heartbeat:VirtualDomain): Started UA-HA2
PCSD Status:
UA-HA: Online
UA-HA2: Online
Daemon Status:
corosync: active/enabled
pacemaker: active/enabled
pcsd: active/enabled
[root@UA-HA ~]#
We have successfully put the node “UA-HA2” in to the maintenance mode and revert it back.
How to stop/start the cluster services on specific node ?
1.Check the cluster status.
[root@UA-HA log]# pcs status
Cluster name: UABLR
Last updated: Sat Oct 17 16:53:02 2015 Last change: Sat Oct 17 16:52:21 2015 by root via crm_resource on UA-HA
Stack: corosync
Current DC: UA-HA2 (version 1.1.13-10.el7-44eb2dd) - partition with quorum
2 nodes and 5 resources configured
Online: [ UA-HA UA-HA2 ]
Full list of resources:
Resource Group: WEBRG1
vgres (ocf::heartbeat:LVM): Started UA-HA2
webvolfs (ocf::heartbeat:Filesystem): Started UA-HA2
ClusterIP (ocf::heartbeat:IPaddr2): Started UA-HA2
webres (ocf::heartbeat:apache): Started UA-HA2
Resource Group: UAKVM2
UAKVM2_res (ocf::heartbeat:VirtualDomain): Started UA-HA
PCSD Status:
UA-HA: Online
UA-HA2: Online
Daemon Status:
corosync: active/enabled
pacemaker: active/enabled
pcsd: active/enabled
[root@UA-HA log]#
2.Let’s plan to stop the cluster services on UA-HA. As per the cluster status, group “UAKVM2” is running on UA-HA.
3.Stop the cluster services on UA-HA and let’s see what happens to the group. From UA-HA node, execute the following command.
[root@UA-HA log]# pcs cluster stop
Stopping Cluster (pacemaker)... Stopping Cluster (corosync)...
[root@UA-HA log]# pcs status
Error: cluster is not currently running on this node
[root@UA-HA log]#
Since pcsd daemon is stopped, you can’t check the cluster status from UA-HA. Let’s check from UA-HA2 node.
[root@UA-HA log]# ssh UA-HA2 pcs status
Cluster name: UABLR
Last updated: Sun Jan 10 12:13:52 2016 Last change: Sun Jan 10 12:05:47 2016 by root via crm_resource on UA-HA
Stack: corosync
Current DC: UA-HA2 (version 1.1.13-10.el7-44eb2dd) - partition with quorum
2 nodes and 5 resources configured
Online: [ UA-HA2 ]
OFFLINE: [ UA-HA ]
Full list of resources:
Resource Group: WEBRG1
vgres (ocf::heartbeat:LVM): Started UA-HA2
webvolfs (ocf::heartbeat:Filesystem): Started UA-HA2
ClusterIP (ocf::heartbeat:IPaddr2): Started UA-HA2
webres (ocf::heartbeat:apache): Started UA-HA2
Resource Group: UAKVM2
UAKVM2_res (ocf::heartbeat:VirtualDomain): Started UA-HA2
PCSD Status:
UA-HA: Online
UA-HA2: Online
Daemon Status:
corosync: active/enabled
pacemaker: active/enabled
pcsd: active/enabled
[root@UA-HA log]#
Group “UAKVM2” has been automatically moved to UA-HA2. What happens , if you start the cluster services on UA-HA ?
[root@UA-HA log]# pcs cluster start
Starting Cluster...
[root@UA-HA log]# pcs constraint
Location Constraints:
Ordering Constraints:
Colocation Constraints:
[root@UA-HA log]# pcs status
Cluster name: UABLR
Last updated: Sat Oct 17 17:03:45 2015 Last change: Sun Jan 10 12:05:47 2016 by root via crm_resource on UA-HA
Stack: corosync
Current DC: UA-HA2 (version 1.1.13-10.el7-44eb2dd) - partition with quorum
2 nodes and 5 resources configured
Online: [ UA-HA UA-HA2 ]
Full list of resources:
Resource Group: WEBRG1
vgres (ocf::heartbeat:LVM): Started UA-HA2
webvolfs (ocf::heartbeat:Filesystem): Started UA-HA2
ClusterIP (ocf::heartbeat:IPaddr2): Started UA-HA2
webres (ocf::heartbeat:apache): Started UA-HA2
Resource Group: UAKVM2
UAKVM2_res (ocf::heartbeat:VirtualDomain): Started UA-HA
PCSD Status:
UA-HA: Online
UA-HA2: Online
Daemon Status:
corosync: active/enabled
pacemaker: active/enabled
pcsd: active/enabled
[root@UA-HA log]#
Group UAKVM2 is automatically move back to UA-HA.
If you do not want to move the resource group automatically ,
1. “BAN” the resource group in which you would like to stop the cluster services.
[root@UA-HA log]# pcs resource ban UAKVM2 UA-HA
Warning: Creating location constraint cli-ban-UAKVM2-on-UA-HA with a score of -INFINITY for resource UAKVM2 on node UA-HA.
This will prevent UAKVM2 from running on UA-HA until the constraint is removed. This will be the case even if UA-HA is the last node in the cluster.
2. Resource group will be automatically moved to other nodes in the cluster.
[root@UA-HA log]# pcs status
Cluster name: UABLR
Last updated: Sat Oct 17 17:18:25 2015 Last change: Sat Oct 17 17:17:48 2015 by root via crm_resource on UA-HA
Stack: corosync
Current DC: UA-HA2 (version 1.1.13-10.el7-44eb2dd) - partition with quorum
2 nodes and 5 resources configured
Online: [ UA-HA UA-HA2 ]
Full list of resources:
Resource Group: WEBRG1
vgres (ocf::heartbeat:LVM): Started UA-HA2
webvolfs (ocf::heartbeat:Filesystem): Started UA-HA2
ClusterIP (ocf::heartbeat:IPaddr2): Started UA-HA2
webres (ocf::heartbeat:apache): Started UA-HA2
Resource Group: UAKVM2
UAKVM2_res (ocf::heartbeat:VirtualDomain): Started UA-HA2
PCSD Status:
UA-HA: Online
UA-HA2: Online
Daemon Status:
corosync: active/enabled
pacemaker: active/enabled
pcsd: active/enabled
[root@UA-HA log]#
3. Cluster creates a constraints to prevent the group starting from the specific node.
[root@UA-HA log]# pcs constraint
Location Constraints:
Resource: UAKVM2
Disabled on: UA-HA (score:-INFINITY) (role: Started)
Ordering Constraints:
Colocation Constraints:
4. stop the cluster service. (If you want to stop the cluster service on the specific node).
5. Start the cluster service.
6. Move the resource group back to the system on desired time.
Cluster Maintenance Mode: (Online)
If you would like to perform the software upgrades and configuration changes which impacts the cluster resources, you need to make the cluster in to maintenance mode . So that all the resources will be tagged as un-managed by pacemaker. Which means , Pacemaker monitoring will be turned off and no action will be taken by cluster until you remove the maintenance mode. This is one of the useful feature to upgrade the cluster components and perform the other resource changes.
1. To move the cluster in to maintenance mode, use the following command.
[root@UA-HA ~]# pcs property set maintenance-mode=true
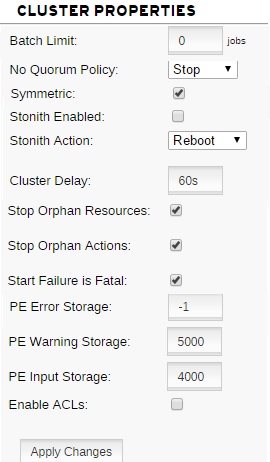
2. Check the Cluster Property
[root@UA-HA ~]# pcs property list
Cluster Properties:
cluster-infrastructure: corosync
cluster-name: UABLR
dc-version: 1.1.13-10.el7-44eb2dd
have-watchdog: false
last-lrm-refresh: 1452507397
maintenance-mode: true
stonith-enabled: false
3. Check the cluster status. Resources are set to unmanaged Flag.
[root@UA-HA ~]# pcs status
Cluster name: UABLR
Last updated: Sun Oct 18 12:19:33 2015 Last change: Sun Oct 18 12:19:27 2015 by root via cibadmin on UA-HA
Stack: corosync
Current DC: UA-HA2 (version 1.1.13-10.el7-44eb2dd) - partition with quorum
2 nodes and 5 resources configured
Online: [ UA-HA UA-HA2 ]
Full list of resources:
Resource Group: WEBRG1
vgres (ocf::heartbeat:LVM): Started UA-HA2 (unmanaged)
webvolfs (ocf::heartbeat:Filesystem): Started UA-HA2 (unmanaged)
ClusterIP (ocf::heartbeat:IPaddr2): Started UA-HA2 (unmanaged)
webres (ocf::heartbeat:apache): Started UA-HA2 (unmanaged)
Resource Group: UAKVM2
UAKVM2_res (ocf::heartbeat:VirtualDomain): Started UA-HA (unmanaged)
PCSD Status:
UA-HA: Online
UA-HA2: Online
Daemon Status:
corosync: active/enabled
pacemaker: active/enabled
pcsd: active/enabled
[root@UA-HA ~]#
4. Resources are continuous to run even though you have stopped the cluster services.
[root@UA-HA ~]# pcs cluster stop --all
UA-HA: Stopping Cluster (pacemaker)...
UA-HA2: Stopping Cluster (pacemaker)...
UA-HA2: Stopping Cluster (corosync)...
UA-HA: Stopping Cluster (corosync)...
[root@UA-HA ~]# virsh list
Id Name State
----------------------------------------------------
55 UAKVM2 running
[root@UA-HA ~]#
Perform the maintenance activity which can be done without rebooting the system.
5. Start the cluster services.
[root@UA-HA ~]# pcs cluster start --all
UA-HA2: Starting Cluster...
UA-HA: Starting Cluster...
[root@UA-HA ~]#
6. Resource should still show as unmanaged & online.
Full list of resources:

 Resource Group: WEBRG1
     vgres      (ocf::heartbeat:LVM):   Started UA-HA2 (unmanaged)
     webvolfs   (ocf::heartbeat:Filesystem):    Started UA-HA2 (unmanaged)
     ClusterIP  (ocf::heartbeat:IPaddr2):       Started UA-HA2 (unmanaged)
     webres     (ocf::heartbeat:apache):        Started UA-HA2 (unmanaged)
 Resource Group: UAKVM2
     UAKVM2_res (ocf::heartbeat:VirtualDomain): Started UA-HA (unmanaged)
7. Clear the Maintenance mode.
[root@UA-HA ~]# pcs property set maintenance-mode=flase
OR
[root@UA-HA ~]# pcs property unset maintenance-mode
8. Verify the resource status.
[root@UA-HA ~]# pcs status
Cluster name: UABLR
Last updated: Sun Oct 18 12:41:59 2015          Last change: Sun Oct 18 12:41:51 2015 by root via cibadmin on UA-HA
Stack: corosync
Current DC: UA-HA2 (version 1.1.13-10.el7-44eb2dd) - partition with quorum
2 nodes and 5 resources configured

Online: [ UA-HA UA-HA2 ]

Full list of resources:

 Resource Group: WEBRG1
     vgres      (ocf::heartbeat:LVM):   Started UA-HA2
     webvolfs   (ocf::heartbeat:Filesystem):    Started UA-HA2
     ClusterIP  (ocf::heartbeat:IPaddr2):       Started UA-HA2
     webres     (ocf::heartbeat:apache):        Started UA-HA2
 Resource Group: UAKVM2
     UAKVM2_res (ocf::heartbeat:VirtualDomain): Started UA-HA

PCSD Status:
  UA-HA: Online
  UA-HA2: Online

Daemon Status:
  corosync: active/enabled
  pacemaker: active/enabled
  pcsd: active/enabled
[root@UA-HA ~]#
Hope this article is informative to you. Share it ! Comment it !! Be Sociable !!!
The post RHEL 7 – Pacemaker – Cluster Node Management – Part 8 appeared first on UnixArena.